Exhaust System Maintenance Many largeframe vespas have ratty, rusty pipes that have been collecting years of carbon deposits and scraping on the ground. Eventually, the exhaust system will need some TLC. My exhaust recently cracked at the weld, so I thought I would show the meaty insides of a stock Vespa exhaust before I try to reweld the thing. The stock exhaust only consists of a few simple parts.
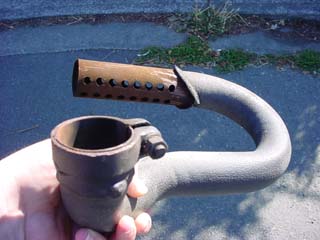
With the exhaust broken apart, we can identify a u-bend pipe that goes from the exhaust stub on the cylinder to a baffle (in this case, a fluted cylinder). There is a convexed piece of metal spot welded to the end of the baffle to direct the charge out the fluted sides or the baffle rather than let it flow straight through. Depending on how these baffles are made, there will be a difference in how the engine operates at certain rev ranges. This is probably as tuned as a stock exhaust get. If the piece of metal falls out of the baffle, it will make a tonne of noise inside the expansion box and may cause a slight loss of performance. If you shake the exhaust and hear a pronounced rattling, the spot weld holding the blocker has likely failed.
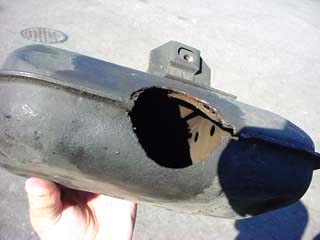
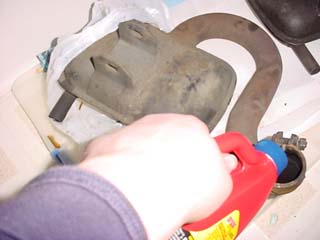
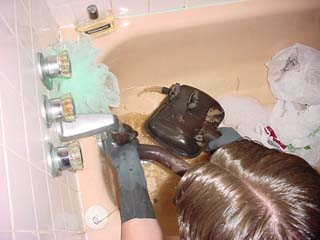
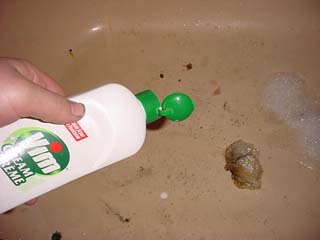
The inside of the expansion box is just an area for exhaust gases to occupy during engine cycles. The area in this box forms an air column that reacts to the various changes in pressure caused by the operation of the engine. On the right hand side is a piece of sheet metal that extends from the top of the expansion box to the bottom. The piece of metal has 4 evenly spaced holes to promote the escape of waste gases. The gases enter a smaller chamber behind the wall and escape through the tailpipe to the outside. To restore the exhaust, you need to get a carbon dissolving agent like sodium hydroxide (drain cleaner) and pour it, unconcentrated, into the exhaust. The longer it sits the more of the build up will disappear. There is nothing to really come loose as you can see, but don't stick a coathanger down the exhaust, because you may damage it more than help it. A liquid cleaner should be sufficient. There is a wire mesh that lines the expansion box. I have no idea why they put this in other than to stop heat buildup, but avoid trying to decoke the exhaust using a torch as it may damage this mesh and cause some problems. Tools & Parts NeededBottle of Drano Extreme (get concentrated sodium hydroxide) Metal hammer and a 7/8" cold chisel. 1200F Manifold Paint "VIM" bathtub cleaner wrench set (13mm 14mm and 17mm) Procedure

All Material Copyright 2001-2026 by Richard Hoar. Use at your own risk. |